Showing posts with label glitter. Show all posts

Saturday, February 27, 2016

Leopard Print / Glitter Recreation

Hi everybody! Today's post is all about a recreation of an old favourite mani of mine. The original was done about two years and you can read and see all about it right here! I absolutely loved that design and recently I was going through some old photos and came across it again and decided to recreate it and kind of update it a bit.

This time round I used Sour Grape by Ulta3 and the same glitter polish, Silver Gleam by Maybelline, as well as Snow Me White by Sinful Colors.

I did a gradient and only used the purple to do the leopard print as opposed to using the colour and then black polish to outline. I think it looks simpler and neater and you can fit more pattern onto the nail.


I really love how this turned out compared to the original, not a bad upgrade! The original is definitely still one of my favourite designs though but it's nice to recreate something like this and I might consider going back and redoing some older designs every so often.

Thanks for reading!

- Melissa.

Wednesday, February 17, 2016

Sheer Tints / Glitter

Hi everyone! Today I have a design that's been around for a while since sheer tint polishes became a big thing. I'm going to start off by saying that this design is quite popular and I couldn't narrow down who first thought to put sheer polish over glitter, it could have been ermahgerdperlish on IG because that just sounds really familiar to me, but I did a bit of a search and couldn't find exactly who or when it was first done, so please excuse my lack of proper credit for this!

On to the post! I've wanted to do this design for a while with the OPI Sheer Tints since I've had them for over a year but just never got around to it, plus I hated using glitter polish because of how annoying it was to remove. But I recently got the UNT Peel Off Base Coat (which is the literal best nail related purchase I've ever made) which makes glitter removal ridiculously easy so there was no excuse to not try this design out!


I used all four of the OPI Sheer Tints and a glitter base of Maybelline's Silver Gleam. I tried to do the colours in order so that when it ended on one nail side, it matched up on the next nail.


I love the look of this and think it's pretty cool! And there's a lot of ways this design could go depending on how you want to apply the sheer tints over the glitter.

That's all for today, thanks for reading!

- Melissa.

Sunday, February 14, 2016

Valentine's Day Nail Art

Good morning everyone! As it's Valentine's Day today, I thought I'd do some nail art to coincide. I'm not someone who celebrates the day or has a lot of thoughts towards it because in the end it's just a day and people can do as they please with days like this. But despite my neutral thoughts towards it, I still felt inspired to do some nail art based around it. It also helped to force me to do some more stamping as the idea I had involved just that.

I actually ended up doing some reverse stamping and creating a decal using my Uber Chic Beauty Mat (there's a bunch of tutorials out there if you want to learn how to do it). The stamping didn't transfer as solidly as I would've liked and I was going to fix up the black outline but when I applied it to my nail I liked how it looked as if it'd been drawn on a bit roughly and quickly. So I'm very happy with how the accent nail turned out. I think it's pretty cute. The polishes I used were Snow Me White - Sinful Colors, Black Out - Sally Hansen, Sour Grape, and Fairy Floss both by Ulta3.


The other nails are a base of Snow & Ice by Savvy, top coated with Don't Violet Me Down, and Be Magentale With Me, both OPI Sheer Tints. I applied them in a sort of diagonal gradient way, but that doesn't show up too much on camera. It's there though, trust me.


I'm genuinely really happy with how these turned out. A lot better than what I had planned in my head. 

That's all for today, I hope everyone has a lovely Sunday!

Thanks for reading.

- Melissa.

Wednesday, December 30, 2015

NYE Glitter Gradient

Hey everybody, I didn't do any Christmas nail art this year, so I thought to round off the year, I'd actually do a blog post on some simple New Year's Eve nails. Honestly, these can be worn any time of the year, but since it's that time of the year, I thought I'd just call them NYE nails!

I really like glitter gradients, and I'd been seeing quite a few around on Instagram, but I don't own a lot of glitter polishes that can be used for a gradient. Then I remembered I had this very old polish from a brand called Savvy, it used to be one of my favourites when I was just getting into nail polish and nail art around three or so years ago. I'd forgotten how much I loved it till I started sponging it on. It's absolutely packed with glitters and the base is a slightly dark blue so when built up with a few coats it becomes pretty opaque on it's own or it's even better with a dark blue polish as a base.


I chose to keep it simple, using only this polish with nothing else except for a clear base coat to protect my nails and make it last longer. The part of my nail that's packed with glitter took maybe two or three coats with a sponge and some smart glitter placement to get it that covered. I love how it's turned out and I think it looks even better with my longer nails than it would if they were shorter.

That's it for tonight's post, which also makes this my last post of the year! I've ordered a bunch of new nail art supplies so I think I'm going to have a lot of fun with nail art next year and hopefully more time and motivation to do them so stay tuned for a bunch of cool stuff in 2016!

Happy New Year everyone!

- Melissa.


Thursday, September 17, 2015

31DC2015: Day 17 - Glitter

I had a lot of trouble with today's prompt because the original design I did didn't turn out quite the way I wanted it to so I went with a completely different design and I didn't really love that one either, but there was no way I was redoing a bloody glitter design for the third time so I stuck with it. It's not even that bad but for some reason I just wasn't in a glitter loving mood!


The glitter is by Maybelline Color Show from their Brocades collection I think, but I can't remember the name. It has small gold specks as well as all the silver so it's a really nice combo but it's not in your face with the gold.

Melissa.

Tuesday, September 15, 2015

31DC2015: Day 15 - Delicate

Today's prompt is another one that I'm not too fond of! I am no good at delicate designs and in the past two years I've always just done a variation of a French manicure. But this year I had zero ideas so I sat down and ended up with the mani below. I used some glitter, some dots and even did a border!


The base is Peach Bloom and the glitter is Orchid Bouquet both by Maybelline Color Show. It's a really lovely glitter top coat that I did one layer of and then sponged on the rest to get a lot on my nail without making it too thick! The purple border was done using the purple striper from Ulta3. I was going to do dots all over the nail but when I did the first two I thought that looked a lot nicer than doing them all over the nail.

I don't know whether this is very delicate but it's minimal and simple and I guess that's the same thing!

- Melissa.

Saturday, September 12, 2015

31DC2015: Day 12 - Stripes

For today's design I had this colour scheme combined with the glitter polish in my head for a few hours while I was redoing the dots from yesterday. And I absolutely love how it turned out, it was exactly how I imagined it and better!

I used striping tape to get the lines so straight and (mostly) even. The glitter is a limited edition from Moonstone Polish that was in a What's In-die Box from one month last year!

The blue is Blue Marlin and the purple is Spring Break, both by Ulta3.


I also used the Revlon Matte Top Coat to dull things down a little bit!

- Melissa.

Friday, July 31, 2015

Purple/Green/Blue Mix n Match

I have a random mix n match design to show you tonight. I started off with the idea of doing some chevron patterns with purple glitter and a purple gradient. But then I realise that I always do purple gradients so I chucked in a green and blue polish and once finished I realised again that I always use this colour scheme.

But anyway, I love how it ended up even though it wasn't my original plan (thanks to being too impatient for the polish to dry, causing the nail vinyls to imprint in my white base and then deciding I should do something else). I've probably done something similar to this because I'm a bit of a one trick pony, but it's something at least!


The base is Snow Me White by Sinful Colors, the lovely glitter is Lavender Sparks by Maybelline Color Show and the three colours are Pamplona Purple by OPI, Suzi Says Feng Shui by OPI and Emerald Inten-City by Ulta3. They all make for such a lovely combo and honestly, if it's not obvious the green/purple/blue colour scheme is one of my favourites to use on my nails. They just work so perfectly together!

That's it for tonight, thanks for reading!

- Melissa

Tuesday, June 09, 2015

Iridescent Glitter Gradient - Born Pretty Store Review

*This product was sent to me for review, all opinions are my own

Tonight I have another review of glitter from Born Pretty Store, this time it's some irregular shaped, shiny and iridescent glitter that I fell in love with when I first saw it on the website. There were so many colours to choose from that I wish I'd been able to get all the colours mixed together in one little pot but because that couldn't happen, I picked number ten, a light blue glitter that also reflects green and dark blue in certain lighting.


Look at how awesome those colours are!!


I had to take these photos outside because my lighting inside just didn't do the colours justice, they'd turned out bleak and dark but outside they were so bright and shiny and all different colours that I knew I couldn't use the photos I took in my lightbox. So I'm very happy I noticed how nice they looked outside!

I had a bit of a problem with applying them and keeping them stuck to the nail because they are a bigger shaped glitter, so that was annoying but applying a thick enough top coat sort of helped with that. However, I did find myself picking at the glitter absentmindedly because they were poking up and sticking out from the nail.

All in all, I love the colours and the way the glitter looks against the black base but they weren't massively practical for me to wear on my nails for more than a day because I did pick at them. 

Don't forget to use the code MEPUK31 for a 10% discount when you shop for anything on the Born Pretty Store website!

- Melissa.

Monday, May 11, 2015

Mint & Coral Mix n' Match

Today I have a fun mix n' match mani that I had the inspiration to do recently. I love when coral and mint colours are paired together so I wanted to incorporate them into a mani as well as some touches of silver glitter, so that's what I did!

When choosing my colours though I realised I had thrown out my favourite coral polish because it was old and gloopy and pretty much empty so instead I went with Coral Heat by Maybelline Color Show and for the mint I chose Kelp Yourself by Sally Hansen.


I really do love how these nails turned out. I think I'm becoming better at planning out a mix n match design that works well together without being too over the top!

- Melissa.

Saturday, May 09, 2015

Glitter Placement Nail Art - Born Pretty Store Review

*This product was sent to me for review, all opinions are my own

I absolutely looove glitter placement nail art so when I saw this glitter I knew it'd be perfect to finally do my own glitter placement. This inspiration came from polishallthenails on Instagram, ever since I started following her a while ago all I've wanted to do is try it out for myself. It's not as perfect because I honestly didn't have the will and strength to place them all evenly but it's still an awesome effort and I love how they look!


As you can see the hexagon glitter came in three colours, blue, pink and gold and there's a lot of it for only $2.45AUD so this stuff will last me forever! What a great bargain.


The macro shot above shows how sloppy I was with my placement but it also shows how cool it all looks. I love how it looks in real life and how shiny and bright it is!

These glitter pots are definitely worth it if you want to try out glitter placement yourself or if you just generally want some glitter for whatever reason. I'm seriously considering purchasing some of the other colours and seeing what other shaped glitters they have on their website. Don't forget to use the code MEPUK31 for 10% off at checkout!

- Melissa.

Saturday, January 03, 2015

Australis Milky Way / Colourful Stripes

Today I have my first nail art of 2015. It's been extremely hot in Melbourne these past two days so yesterday after work I quickly smashed out this mani before my room became too hot to work in as I wanted to get a new post up this weekend.

It's a very simple mani using an Australis polish called Milky Way as inspiration for the stripes. I've wanted to use this glitter for a while now but every time I tried to I just couldn't think of a design that would go with it; I also had a bit of trouble applying it perfectly but this time round I started with a white base, applied one thick-ish coat of the glitter and then once dry, dabbed some polish onto a piece of paper and picked up and placed single bits of the glitter onto my nails to make it look packed on. I love how it turned out, it's such a nice glitter polish with the white base colour and a lot of colourful and different sized glitters.

I matched the stripes to four of the colours in the glitter using the following polishes:
Frog Prince - Ulta3
Manic Panic - Australis
Lacy Daisy - Ulta3
Block It Out - Ulta3


As you can see I applied a matte top coat which makes me love this mani even more! The matte glitter actually reminds me of jawbreakers when I think about it; that chalky sort of effect.

Thanks for reading!

- Melissa.

Saturday, December 27, 2014

Bright & Colourful Mix n Match Mani

Hi everybody!

This post was supposed to be up yesterday but I went on an impromptu road trip to see my grandparents instead and wasn't able to edit the photos or write up a post.

I've been wearing this bright mani for the past few days now (although it's all chipped by now). It's a bright and colourful design but I'm not sure how much I loved it, it kind of became annoying after a few days.

Anyway, I used a bunch of polishes that I can't remember the names of and I'm not near my nail desk to find them, so if you want to know a certain polish just ask and I'll have a look!


Just a quick post today to make up for the lack of posts the last few days, but stay tuned because in the next few days I'll have my bellabox review up and a 2014 favourites post which I'm in the middle of making! It'll be full of ALL my favourites of the year, nail art, makeup, skincare, etc.

Thanks for reading!

- Melissa.

Friday, December 05, 2014

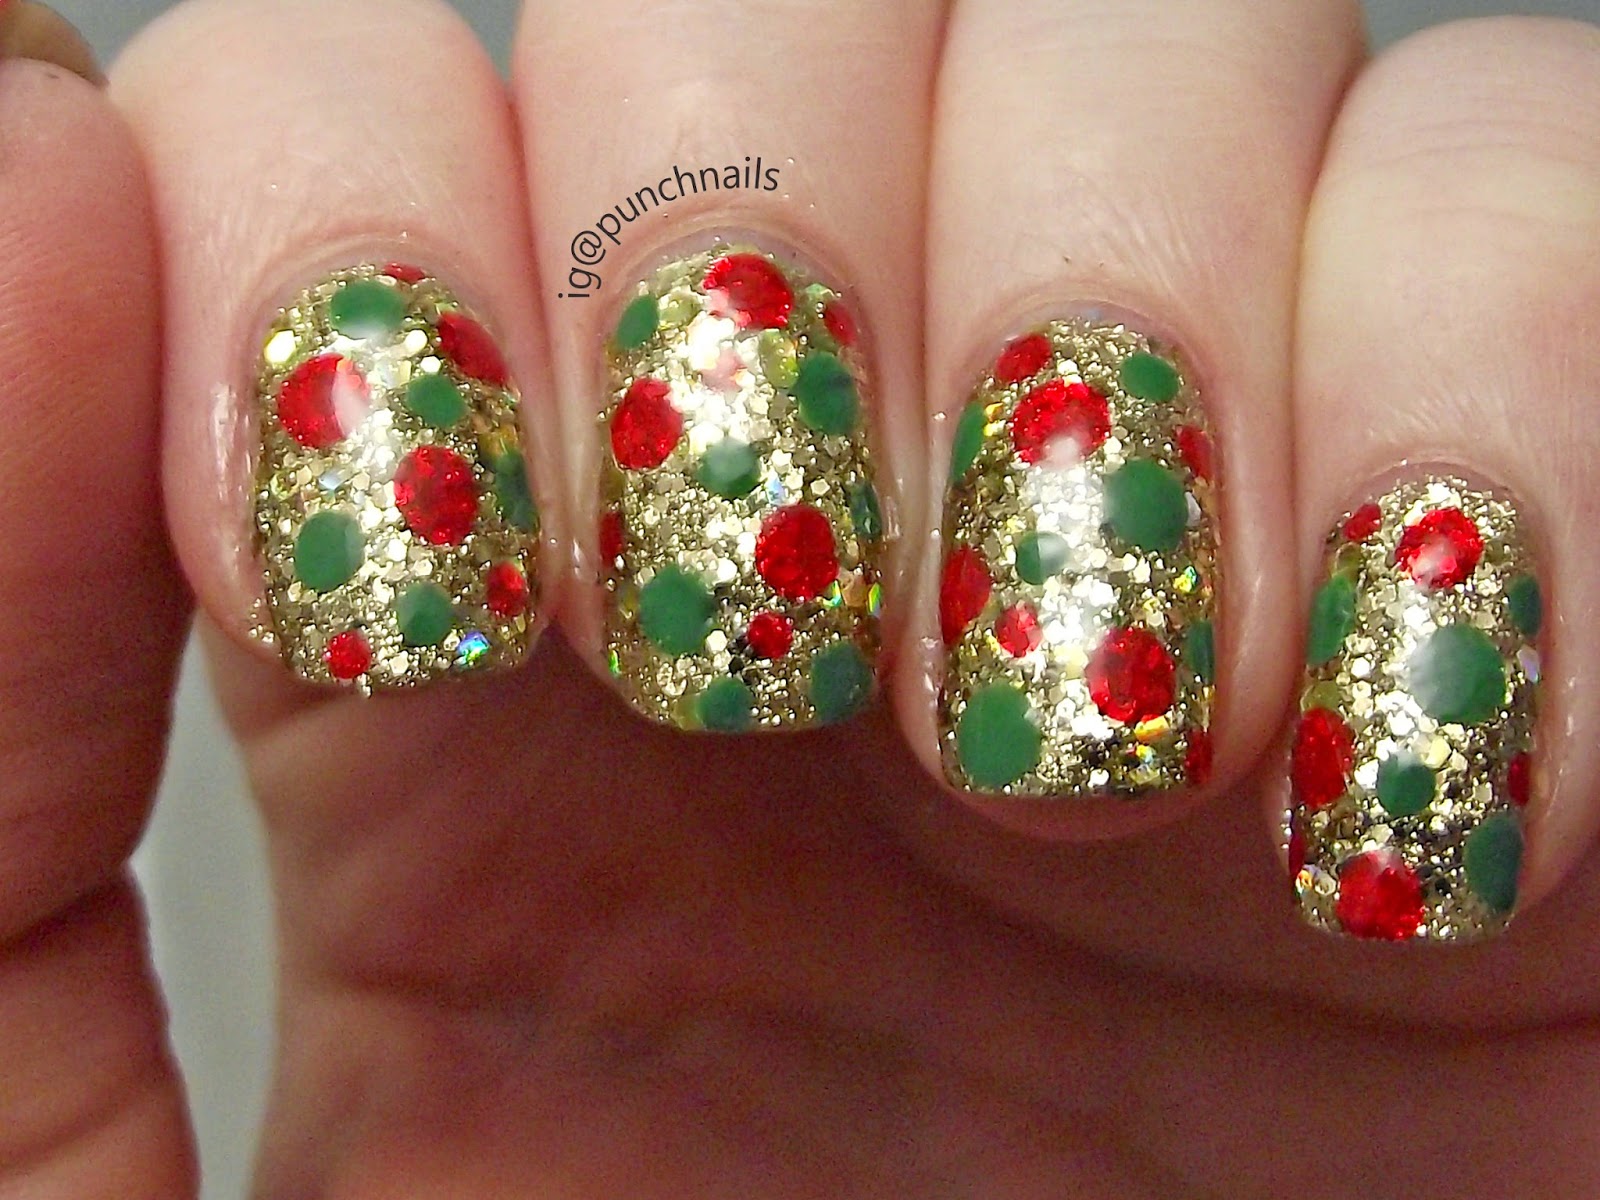
Christmas Nails

Hello everyone!

Today I have some Christmas themed nails to share with you! Let me start off by saying that I'm not someone who gets really into Christmas; it's just not my thing. So these nails are out of my comfort zone. I'm also not someone who gets into doing holiday or special event themed nails like Easter or Halloween (as you've probably noticed) so appreciate these nails because I doubt I'll do another this year.

I used the following polishes:
Gold's Night Out - Maybelline Color Show Sequins Collection
Scarlet - Ulta3
Don't Mess With OPI - OPI


It's nothing spectacular but it's definitely a Christmassy mani. Let me know what you think and whether you'd like to see me do another Christmas mani! I may or may not do another one, but we'll see!

- Melissa.

Saturday, November 29, 2014

Purple & Glitter - Maybelline Color Show

Hi everybody! I have a super quick post today because it's been so long since I've done anything nail art related. Recently I got a huge order from Ozsale of Maybelline Color Show polishes (if you follow my instagram you'll have seen this!).

So today I've used Passionate Plum (the base colour) and Sapphire Masquerade for the glitter! Such a good combo because the glitter has the same base colour as Passionate Plum so they worked so well together to make it all opaque. The pink stripes is Dutch Tulips by OPI.

Passionate Plum is a lot more purple and metallic in real life, while the glitter was a bit weird to apply as it seemed to make some of the glitter a bit dirty (it's hard to explain but it all smoothed out and sparkled with a top coat).

I love this combo and I'm so surprised that I love this metallic polish as much as I do because we all know it's not my favourite finish!


That's all for today! Now I'm going to try to do a bunch of nail art for the next few posts! Thanks for reading.

Monday, November 17, 2014

White Dots / Glitter Accent

Hi everybody! It's been a week since I last posted but I'm back today with some nails I did recently. I did these nails over a week ago because last week I got my nails professionally done (just a simple french gel mani) for my sister's wedding over the weekend where I was the maid of honour. So these nails today are a filler until I take the gel off, which I may do this week because I'm not a massive fan of them.

This mani is just a simple blue dotticure using Blue Marlin by Ulta3 with a glitter accent by Moonstone Nail Polish called Star Queen Nebula from the September What's In-Die Box (which I never posted swatches of and I'm very disappointed in myself for but oh well, you'll eventually see them all when I use them in future manis). I believe the white dots were Lily White by Ulta3 also.


That's all for today! Hopefully I'll be back to normal nail art by the weekend if I can get this gel polish off safely without ruining my nails! Thanks for reading.

Wednesday, September 17, 2014

31DC2014: Day 17 - Glitter

Hi everyone! Super quick post tonight on these glitter nails that I did after work today. I had no real plans for these and just used what was already on my desk. I used Total Eclipse - Rimmel, the other Space Dust polish I have, Urban Utopia - Maybelline Color Show and Stop The Press - Ulta3. I was a bit annoyed because when I applied Stop The Press it turned the Maybelline polish a different colour, sort of a lighter green. It doesn't really show on the pictures but if I was to wear this for a few days, it'd look a bit silly. Maybe the formulas just don't go well together.


That's all for today, nothing special but still an okay mani. Thanks for reading!

Saturday, August 16, 2014

Maybelline Color Show Nail Polish Swatches

Hello there, today I have some swatches for you! I've never done a post full of swatches before but I got quite a few new Maybelline polishes, so I thought I would share them with you all. I now understand why I've never done a swatch post before, it's hard work! I have so much more appreciation and respect for the girls who constantly do swatches.

The reason I decided to this post is because I also purchased the Maybelline Express Remover, which I'm sure everybody has heard about before. If you haven't, you should go out and buy one immediately. I always get lazy removing polish and a lot of the time I'll leave the house with only one hand painted because usually I only paint one hand when I blog. But the Express Remover is such a quick way to remove polish, you just dip your finger in the container, which has a sponge full of remover in it, and move your finger around for a few seconds and when you remove it, the polish is gone! I wondered what it'd be like with glitter polish and let me tell you, it was quite messy. It definitely removed the polish and majority of the glitter, but it also leaves you with bits of glitter over your fingers which takes a bit more effort to remove. But, despite that, it's still such a good product and I can't believe it took me this long to buy it.


The glitter top coats are all from the Street Artist collection, I think there are five polishes all together, but the Priceline I bought these from only had four and after researching around a bit I only saw four in the Australian range but overseas had five in theirs so I'm unsure if there really is a fifth in the Australian range or if Priceline just had a fifth space for no reason.

I didn't top coat any of these swatches. Also, please excuse the difference in colour of some of the photos, I promise the polishes are all true to colour despite it.

Peach Pie is a very sheer peachy creme polish. In real life it has a very delicate shimmer to it that I couldn't capture on camera. You know how beauty bloggers sometimes refer to a lipstick as My Lips But Better? Well to me, this polish is My Nails But Better. It's a lovely light colour that is very wearable and would be a good base for nail art. This is three coats with no top coat.


Boom Box Black is a neon green and black glitter top coat full of small and medium sized glitters. The below picture shows one coat and I think that's a pretty decent coat. It's packed full of glitters and I had no trouble getting them to spread and cover the nail in only one swipe. That applies to all the glitter top coats actually. I did dip my brush back in the bottle to fill in some spots and I definitely think a second coat would have been even better, but I quite like how effective it was with only one.


Cool Touch is a grey/blue creme that took three coats to be come full opaque. I absolutely love this one, it's gorgeous and I'm a sucker for a good grey polish. It's simple and bright and as they name suggests, very cool toned.


White Splatter is the only glitter in this collection that is different to the others as it has metallic flakes in it that range from blue to green to purple. It has a huge mix of sizes as well, as you can see below there are large, medium, small and even smaller glitters, as well as stripe glitter too. It's very interesting to say the least! This was only one coat.


Pink Boom is a bubblegum pink creme that looks good enough to eat. It's very bright and very candy-like. I'm not a massive fan of pink polish, I think it makes my nails and hands look old in real life, but I love it anyway and I'm sure I'll be using it in future nail art! This is three coats.


Alley Attitude is my favourite glitter of the collection. It's a neon blue and black glitter top coat that stands out so much. Blue is my favourite colour, so I knew I would love this one, but I didn't think I would love it as much as I do. Below is only one coat and just look at it! It's covered the nail very nicely without any patches. And this combo with Pink Boom is amazing. 


Babe It's Blue is the brother to Pink Boom in my opinion. They have the same bright finish and look like they should be the colours of lollies or something sweet. This polish was opqaue in only two coats and I think it's my new favourite blue. Also, how good is the name?! I love it.


Urban Vibe has the same sized glitter flakes as the others in black and orange. Just like with the others, this was only one coat and I think that's pretty good coverage. This isn't my favourite glitter as I don't think I'm a huge fan of the black and orange combination but maybe on a different base it would look better.


Purple Gem is a shimmery purple polish with what I think were tiny, tiny flecks of pink throughout it. It's a very nice colour and only took two coats to become opaque but just like with Pink Boom, I don't think it suits my skin tone and makes my hands look old in real life. I really do like this colour though and I'm going to find a way to wear it without hating how it makes my skin look.


That's all the swatches! It took a good few hours to do it all and my back hurts a bit from hunching over my nails but I'm happy with how they all turned out and I'm glad I've finally done a big swatch post. It's all worth in the end when the post comes together and maybe I'll do some more in the future when I get new polishes, no matter how old or new they might be in the nail world. Let me know if you'd like to see more posts like this!

Have a lovely weekend.