Showing posts with label opi. Show all posts

Wednesday, February 17, 2016

Sheer Tints / Glitter

Hi everyone! Today I have a design that's been around for a while since sheer tint polishes became a big thing. I'm going to start off by saying that this design is quite popular and I couldn't narrow down who first thought to put sheer polish over glitter, it could have been ermahgerdperlish on IG because that just sounds really familiar to me, but I did a bit of a search and couldn't find exactly who or when it was first done, so please excuse my lack of proper credit for this!

On to the post! I've wanted to do this design for a while with the OPI Sheer Tints since I've had them for over a year but just never got around to it, plus I hated using glitter polish because of how annoying it was to remove. But I recently got the UNT Peel Off Base Coat (which is the literal best nail related purchase I've ever made) which makes glitter removal ridiculously easy so there was no excuse to not try this design out!


I used all four of the OPI Sheer Tints and a glitter base of Maybelline's Silver Gleam. I tried to do the colours in order so that when it ended on one nail side, it matched up on the next nail.


I love the look of this and think it's pretty cool! And there's a lot of ways this design could go depending on how you want to apply the sheer tints over the glitter.

That's all for today, thanks for reading!

- Melissa.

Sunday, February 14, 2016

Valentine's Day Nail Art

Good morning everyone! As it's Valentine's Day today, I thought I'd do some nail art to coincide. I'm not someone who celebrates the day or has a lot of thoughts towards it because in the end it's just a day and people can do as they please with days like this. But despite my neutral thoughts towards it, I still felt inspired to do some nail art based around it. It also helped to force me to do some more stamping as the idea I had involved just that.

I actually ended up doing some reverse stamping and creating a decal using my Uber Chic Beauty Mat (there's a bunch of tutorials out there if you want to learn how to do it). The stamping didn't transfer as solidly as I would've liked and I was going to fix up the black outline but when I applied it to my nail I liked how it looked as if it'd been drawn on a bit roughly and quickly. So I'm very happy with how the accent nail turned out. I think it's pretty cute. The polishes I used were Snow Me White - Sinful Colors, Black Out - Sally Hansen, Sour Grape, and Fairy Floss both by Ulta3.


The other nails are a base of Snow & Ice by Savvy, top coated with Don't Violet Me Down, and Be Magentale With Me, both OPI Sheer Tints. I applied them in a sort of diagonal gradient way, but that doesn't show up too much on camera. It's there though, trust me.


I'm genuinely really happy with how these turned out. A lot better than what I had planned in my head. 

That's all for today, I hope everyone has a lovely Sunday!

Thanks for reading.

- Melissa.

Sunday, January 17, 2016

Sponged Stripes & Bright Dots

I have another summery design today! There's nothing too special about this mani but I wanted to do a blog post regardless to give a few more details about it!

I started with a base of Sinful Color's Snow Me White and then dotted on Pamplona Purple - OPI, Naughty Nautical - Essie, and Did It On 'Em - OPI. For the accent nail, I applied a fast drying top coat, waited twenty minutes just to be safe, and applied some striping tape (the kind you can get from ebay). Then with ripped up bits of sponge, I sponged on the three colours. I didn't want to do a gradient or even combine the colours too much which is why I did each colour individually and it turned out way better than expected!


I really love this mani and I'm super proud of it. At first I wasn't sure about the colour combo, but as I did it, I realised it was a good choice and I was glad I didn't change any colours.

I'd love to do a full mani with the design from the accent nail and try out another colour combo!

Thanks for reading!

- Melissa.

Friday, November 20, 2015

Palm Tree Decals - Born Pretty Store Review

*This product was sent to me for review, all opinions are my own

The people at Born Pretty Store were kind enough to send me some of their nail art products to review, so first up are these summery water decals which I thought were really cute and easy to incorporate into nail art!

I chose the black decals because I already had a mani in mind when picking them. I've seen this design done by so many people that I always wanted to try it out but knew I'd never be able to hand paint the palm trees so when I saw these decals, I knew I had to get them.

To create my sunset base I used three polishes on a sponge to create a nice gradient. They were: Fierce N Tangy by Maybelline Color Show, In My Back Pocket by OPI, and OPI On Collins Ave by OPI. I then used those three colours on a small fan brush to blend the gradient together even more and to further even it out once I'd done that I used some acetone on the fan brush and lightly swept it across the nail to make it smooth and very blended. It turned out really well and I was very happy with it!


These were the set of decals I got, and as you can see there's a wide variety of designs to choose from but I went with the simple palm trees by themselves and the palm trees with the sun and grass. As usual, water decals are so simple to use as all you need to do is cut out the image you want, remove the plastic protector, dip the cut out in some water for 10-15 seconds and then gently remove the decal from the backing (if damp enough it'll simply slide off). Once that's done you can then carefully apply them to your nail using tweezers, flatten down, let it dry and then top coat it to protect it and help it last longer!


I added black polish to the middle and ring fingernails to help make it look like one picture as only the trees were the decal, whereas the index and pinky ones were all part of the decal and didn't need anything added to them.

I love how these turned out and I'm happy to have finally been able to do this design after loving all the ones I've seen over the years. It's one of my best gradients too.

Make sure you check out all the nail art products on the website and don't forget that I have a 10% off discount code to use when you buy anything from Born Pretty Store, the code is: MEPUK31.

Enjoy!

- Melissa.

Friday, November 06, 2015

Purple Pond Mani

Today's post will just be a quick one considering I did this mani for the blue prompt in the challenge in September, but had the urge to try it out in a different colour recently.

I used an OPI Sheer Tint again in the colour Don't Violet Me Down and I still really love this type of mani. I did less dots than last time so there's less definition than my previous one but it still looks super cool and 3D.


I really enjoy the look of this design because it's simple and still stands out. I think I did three or four layers on the sheer tint because I didn't want it to be too thick since I wanted to top coat it and wear it for a few days.

That's it for today! Thanks for reading.

- Melissa.

Friday, July 31, 2015

Purple/Green/Blue Mix n Match

I have a random mix n match design to show you tonight. I started off with the idea of doing some chevron patterns with purple glitter and a purple gradient. But then I realise that I always do purple gradients so I chucked in a green and blue polish and once finished I realised again that I always use this colour scheme.

But anyway, I love how it ended up even though it wasn't my original plan (thanks to being too impatient for the polish to dry, causing the nail vinyls to imprint in my white base and then deciding I should do something else). I've probably done something similar to this because I'm a bit of a one trick pony, but it's something at least!


The base is Snow Me White by Sinful Colors, the lovely glitter is Lavender Sparks by Maybelline Color Show and the three colours are Pamplona Purple by OPI, Suzi Says Feng Shui by OPI and Emerald Inten-City by Ulta3. They all make for such a lovely combo and honestly, if it's not obvious the green/purple/blue colour scheme is one of my favourites to use on my nails. They just work so perfectly together!

That's it for tonight, thanks for reading!

- Melissa

Monday, July 20, 2015

Watermelon Nail Art

I have a quick post tonight to show you some watermelon nail art I did over the weekend! It's nothing special and I don't really love them that much; they definitely could be better but they're still fun and it's my first time doing this design, so I can only improve from here, right?


The red base is Pink Colada by Ulta3, the dark green is Don't Mess With OPI by OPI, the white is Snow Me White by Sinful Colors and the lighter green is a mix of the OPI shade and Mojito Madness by Essie.

I think next time I would use a lighter shade of pink but I know that this colour would be perfect for some strawberry nail art!

Thanks for reading!

- Melissa.

Wednesday, June 10, 2015

Gradient / Grid Nail Art

These nails I'm showing you today are probably up there on my list of favourite nail art I've ever done, they're probably in the top five at this moment! It's hands down the best gradient I think I've ever done and while the grid I added isn't the straightest or neatest, it still looks really cool and eye catching.

I used the following polishes:
Sunset Pink - Ulta3
In My Back Pocket - OPI
Frangipani - Ulta3


I absolutely love this, I've never done a gradient so well and the grid just bought it all together and made the gradient look even smoother. The only annoying thing about this mani is that Seche Vite shrunk it; maybe it was combined with the matte top as well, but it's always a shame when it happens!

I just hope in the future that I can get better and doing straight lines and then I can do this design perfectly.

- Melissa.

Tuesday, December 23, 2014

Plaid Stripes

Hello!

I'm not one hundred percent sure that these are actually plaid stripes but it was the best thing I could think of to call this post, but anyway, this is a design I haven't done before or even really thought of doing but I actually love how it turned out. All I did was paint some horizontal lines first in three different colours, alternating where the stripes were on each nail and then paint some vertical stripes using the same idea. So I guess it sort of is plaid, just without the over and under lapping of stripes.

For this design I used a base of Audacious Asphalt by Maybelline Color Show, and the stripes were Suzi Says Feng Shui by OPI, Lilac Bloom by Ulta3 and Devil's Advocate by Essie.


This design is so versatile and would work with any colour combo I reckon. It's so easy and eye catching!

That's all for today! Thanks for reading.

- Melissa.

Sunday, December 21, 2014

OPI Water Colour / Sheer Tints

Hey everybody!

I've got a quick Sunday evening post for you all on some more nail art using the Sheer Tints from OPI. This time I just painted the polish on random parts of each nail and let them overlap to create new colours. It's so damn simple but still so cute and pretty. I really love it.


I love how it makes different colours when you overlap them, it shows how much the colours can be used to always make something cool and different. I really do love these polishes!

That's all for tonight because there's not much else to say!

Thanks for reading.

- Melissa.

Friday, December 19, 2014

OPI Sheer Tints Dotticure

Hi everybody!

I recently picked up the Sheer Tint Top Coats by OPI from a Catch Of The Day Sale. I had been eyeing these off ever since they were everywhere on Instagram and in the blogging world, but of course I wasn't going to pay full price for them because that's just way too much for four polishes. So I waited and as soon as I saw them on a COTD sale (thank you to my sister for notifying me of it) I had to get them! I'm happy I did, they're a really cool addition to my collection and something very different. Everyone knows I love watercolour designs so I can't wait to experiment further with these polishes!

For this mani I just did a simple dotticure. I didn't realise how stringy these polishes were though! It was crazy how much my fingers were covered in stringy polish while I was trying to dot it on my nails. I don't think I'll work with it like that again, as in blobbing the polish on paper and then taking the polish from that blob, it was all just a bit too messy.

Anyway, onto the mani! I used all four of the polishes for this one with a base colour of White On by Sally Hansen.


The more I look at them, the more I think that they look like I should have worn them to a baby shower. Definitely very pastel and soft! I like them though, I do wish the blue was a bit brighter though, it just seems a bit duller than the other colours.

That's all for today! Hope you enjoyed them and get ready for some more designs using these polishes in the coming weeks.

- Melissa.

Wednesday, December 17, 2014

Splattered Floral Nail Art (Inspired By Chalkboard Nails)

Hello there everybody!

So today I have a post inspired by the very talented Sarah from Chalkboard Nails, particularly this tutorial on some easy splattered floral nail art. I loved this design from the moment I saw it and knew I wanted to try it out as it's something very different to what I'd normally do.

My base is My Vampire Is Buff by OPI with the flowers being Pink Boom and Coral Heat by Maybelline Color Show. When I added the leaves using Chic Charteruse I realised they were a bit too neon but I rolled with it anyway! I then added some small black dots to define the bigger flowers. And then to top it all off I used a Matte top coat. Oh and I only did two nails because I just couldn't get the sticky tape right for all four.


I quite like them! I haven't taken these off yet just because they're so nice and lovely and I'm kind of proud of them.

Make sure you check out the tutorial through the link to see how it's all done and maybe recreate it yourself!

Thanks for reading!

- Melissa

Friday, December 05, 2014

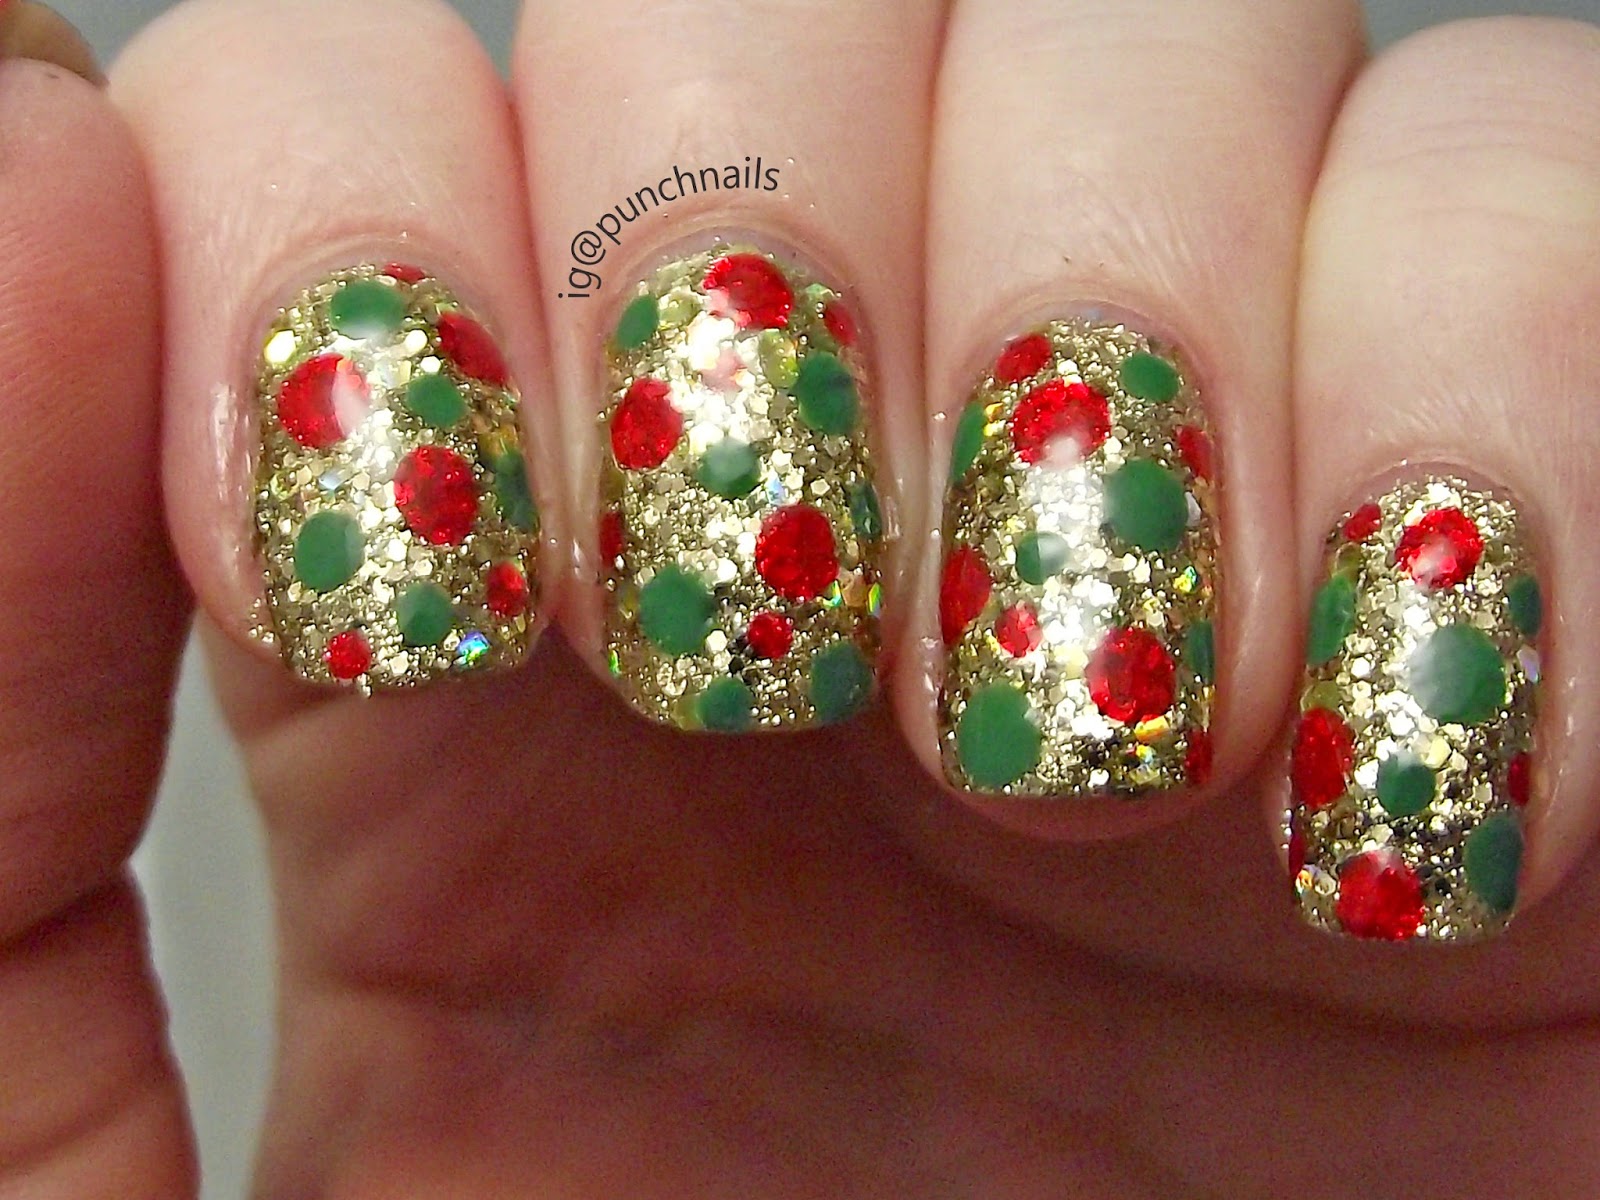
Christmas Nails

Hello everyone!

Today I have some Christmas themed nails to share with you! Let me start off by saying that I'm not someone who gets really into Christmas; it's just not my thing. So these nails are out of my comfort zone. I'm also not someone who gets into doing holiday or special event themed nails like Easter or Halloween (as you've probably noticed) so appreciate these nails because I doubt I'll do another this year.

I used the following polishes:
Gold's Night Out - Maybelline Color Show Sequins Collection
Scarlet - Ulta3
Don't Mess With OPI - OPI


It's nothing spectacular but it's definitely a Christmassy mani. Let me know what you think and whether you'd like to see me do another Christmas mani! I may or may not do another one, but we'll see!

- Melissa.

Tuesday, December 02, 2014

OPI Water Marble

Hello lovelies,

So it's been quite a while since I last did a water marble design as the last one I did was for the 31DC2014 (check here) so I thought it was about time I did a new one, especially considering I recently got three brand new OPI polishes (and we all know how much I love water marbling with OPI, so much so that I think another blog post probably has this title already). 

The three polishes I used were:
Pamplona Purple
Dutch Tulips
Samoan Sand (which mostly went sheer in the water but I wanted to break up the colours)

I absolutely love how these turned out! I'm so damn happy with them and I can't believe it's been over two months since I last marbled!


(PS I'm trying out a new white background, opinions? I'm not sure if I love it or not!)

That's it for today's post! I'll be back again soon with another.

Thanks for reading!

- Melissa.

Monday, December 01, 2014

Purple / Pink Swirls

Hello everyone! To get me back into the swing of things, I thought I'd do some nail art that I love, even though I've only done it a few things. Swirls are so easy to do and you can get away with them being a bit messy.

For this design I used two OPI polishes: Dutch Tulips and Pamplona Purple. 


I don't know if I've said it before but I'd love to try this with three colours, which I think I'd have to use a smaller dotting tool and a lighter hand to achieve. But it'll be a good future challenge!

- Melissa.

Saturday, November 29, 2014

Purple & Glitter - Maybelline Color Show

Hi everybody! I have a super quick post today because it's been so long since I've done anything nail art related. Recently I got a huge order from Ozsale of Maybelline Color Show polishes (if you follow my instagram you'll have seen this!).

So today I've used Passionate Plum (the base colour) and Sapphire Masquerade for the glitter! Such a good combo because the glitter has the same base colour as Passionate Plum so they worked so well together to make it all opaque. The pink stripes is Dutch Tulips by OPI.

Passionate Plum is a lot more purple and metallic in real life, while the glitter was a bit weird to apply as it seemed to make some of the glitter a bit dirty (it's hard to explain but it all smoothed out and sparkled with a top coat).

I love this combo and I'm so surprised that I love this metallic polish as much as I do because we all know it's not my favourite finish!


That's all for today! Now I'm going to try to do a bunch of nail art for the next few posts! Thanks for reading.

Wednesday, October 01, 2014

31DC2014: Day 30 - Inspired By A Tutorial

Hi everyone, here's the second last post for the challenge! I'm pretty over it and briefly considered not even doing the last two, but I powered through two manis this afternoon because why give up now?!

Today I was inspired by this tutorial from Nailed It NZ (Jessie), who is super talented and very good at what she does. She's also inspiring because she's turned her hobby into her career and it's been fun to be a part of and watch her progress through her blog.

I chose the mini strawberry tutorial because it seemed like something I could do in about twenty minutes, and it was! I knocked these out in about that time, maybe less. They were super easy and even though I had trouble with the placement on some nails, I think they're pretty okay! They could be better, but I'm happy with how cute they look.

I used White On - Sally Hansen as a base, Scarlet - Ulta3 for the strawberries, Sheer Peach - W7 for the little seeds and Don't Mess With OPI - OPI for the leaves.


The more I look at them, the more some of them look like carrots haha, they're too triangle shaped! But still cute.

Thanks for reading!

Tuesday, September 16, 2014

31DC2014: Day 16 - Geometric

Hi everyone! Today's prompt is geometric and I was actually looking forward to it after my little experiment with shapes for day six, but the last two days at work have been quite busy so I didn't have a lot of time to plan anything out. But last night I was browsing through a Google images of geometric shapes and suddenly I thought of an idea and quickly drew it down so I'd remember it today!

The design isn't anything special and I only did it as an accent nail because I knew I wouldn't be able to concentrate long enough to do it on all four of my nails (I don't paint both hands in the challenge or even my thumb nail, it's just a waste). I was already getting frustrated with the first piece of striping tape so I'm glad I only did one nail. I grabbed a few glitter polishes and chose one for another accent nail. Then, just to add something a little extra to the mani, I put some studs from this kit on the plain coloured nails. I don't love the studs though, I bought them a while ago just so I would have them in my collection but I'm not a fan!


The teal colour is Suzi Says Feng Shui - OPI, the purple is Liberty - W7 and the glitter is Luna Love - Rimmel (Space Dust Collection). I am in looove with the glitter; I bought two space dust polishes months ago but never really used them because I forgot about them, but they're amazing!

Looking at the pictures makes me realise that yep, I definitely hate the studs, they just look funny on my nails I think. Oh well, I experimented haha.

Thanks for reading!

Sunday, September 14, 2014

31DC2014: Day 14 - Flowers

Hey everyone! Today's prompt is flowers and I have to admit I wasn't looking forward to this one too much, I think in the whole time I've been doing nail art, I've only ever done flowers two or three times. I'm just not a fan and I can never get them right. But today I stuck with something I've done before (from this tutorial) because it was easiest and seemed better than doing a simple daisy design (not that I have a problem with them, because I love daises, I did them for last years flower prompt and didn't want to repeat them this year).

I started with a black base of Lotsa Fun - Ulta3, a nice deep blue/purple colour. Then I dotted on the following colours:
White Satin - Ulta3
Soft Hydrandea - Ulta3
Baguette Me Not - OPI
Strawberry Sundae - Ulta3
Turquoise Paradise - Maybelline Color Show
Fresh Squeezed - Ulta3

The leaves are a mix of Mojito Madness - Essie and Don't Mess With OPI - OPI.


They do look quite similar to a design I've previously done with this method but oh well, whatever. Still can't decide whether they look like flowers or not though.


Friday, September 12, 2014

31DC2014: Day 12 - Stripes

Hello lovelies! Today is stripes day and it's no surprise what design I went with today, the simple layered stripes I originally learnt from this tutorial.

I used the following polishes:
Metropolitan - L'Oreal
Make Mine Mango - Revlon
Manic Panic - Australis
Did It On 'Em - OPI

I love how these turned out, ever since I reorganised my collection I told myself I need to start using other polishes other than Ulta3 and Essie so I branched out with this design and picked polishes I haven't used for a while. I'm very happy I did because these were a great combo!


Check back tomorrow for animal print day!