Showing posts with label tutorial. Show all posts

Friday, February 06, 2015

January Round Up

So, long time no posting! But I did warn that it would happen so there's no surprises there! But I thought I would do a round up post for the times I don't post much and round up what I've been doing recently. I've actually found that I get a lot more nail art done when I'm not worrying about writing the blog post to go with the pictures so if you follow me on Instagram you'll have seen that I was posting a lot recently.

Let's look at some nail art!

I absolutely love this colour combination for the leopard print below. The silver and coral polishes go really well together and I'm glad it turned out as good as it looked in my head.

I filmed a tutorial for this design below (see end of post for video). I love the colours and this design is definitely in my top ten favourite things to do.

This post and the one above were posted on my instagram while I was away in Queensland for a few days. It's a sort of plaid like design that is super easy to do.

After my little holiday I took a mini break from nail art just because my nails were in bad shape from being in the pool a lot, but I came back with this awesome splatter nail art. It's one of my favourites that I've ever done, the colours just go well together and the splatters are perfect sizes!

This ended up being the base of some nail art that is under this post but I thought I'd chuck it in here seeing as I did post it on my instagram.

Painting the black sections over this gradient just bought it all together for me and made the gradient look smoother and neater. I used to tape to get clean, straight lines.
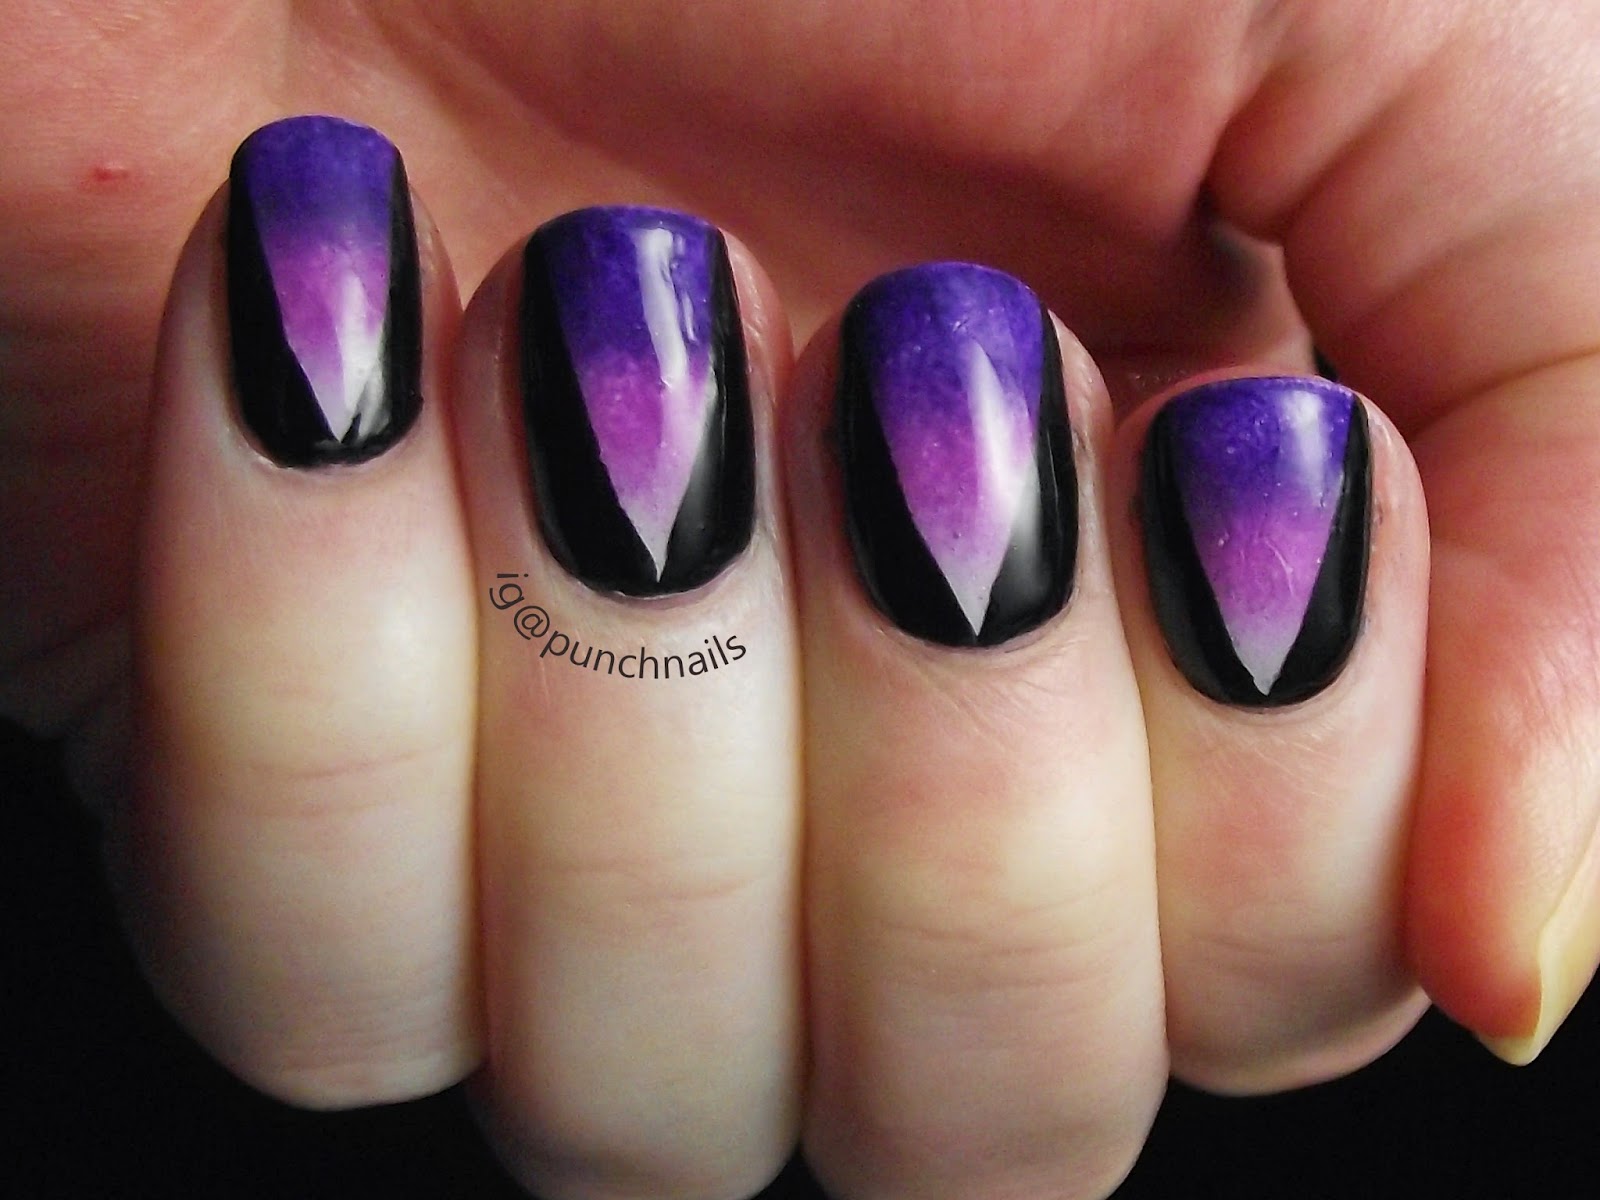
I've only done this design once before in a mix n match mani but I thought I'd incorporate a few colours and see how the pattern turned out and I love how it ended up. I did this in about ten mins (minus the white polish drying time) so I think this will be my go to mani when I'm short on time or lacking inspiration.

And here's the video for the striped nail art.


That's all for this round up post! I actually have a few exciting posts coming up, but I'm not exactly sure when they'll be so keep an eye out for any posts over the next month or so! I'll try to make posts for at least one mani every few weeks, but I enjoy doing these round up posts till I get back into the flow of blogging.

Thanks for reading!

- Melissa.

Saturday, October 18, 2014

Cling Wrap Nail Art Tutorial

Hi everyone! Long time, no post; sorry about that! I've been quite preoccupied with some personal stuff and didn't really have the time or energy to do my nails properly. But here I am tonight with another tutorial for you all! This time it's the super simple cling/glad wrap mani that is a long time favourite of mine because of how quick and easy it is and how lovely the results can be. 

For this tutorial I started with a base of Lacy Daisy and topped it with Tone It Up, both by Ulta3 (I know, I know, I'm still mostly using Ulta3 polishes but I can't help it! They're just so cheap and amazing!). As you'll see in the video, this method is so easy that you'll pick it up in no time and want to do more and more.


I often think that this design can look a lot like marble, it's so pretty and when top coated, the layers blend in nicely and become smoothed out. It's been a while since I last did one of these which is why I'm rediscovering my love for them! 


Hope you enjoyed the video and if you recreate something using my tutorials, tag me on Instagram (@punchnails) or use the hashtag #punchnails 

Thanks for reading and watching!

Saturday, October 11, 2014

Swirly Nail Art Tutorial

Hey everyone! You might remember back at the start of the challenge in September I did some green swirls; well today, I'm back with a tutorial on them! I also added another colour this time and I think it gives it a lot more dynamic. I also love my colour choice because I don't usually for bright oranges and pinks together and I think they worked out really well.


The polishes I used were both by Ulta3 (as usual), the orange is Tangelo Twist and the pink is Fruit Tingle.

Watch the video below to find out just how easy it is to do these nails, and don't forget to subscribe!


Monday, August 18, 2014

Pastel Watercolour Tutorial

Good evening everybody! I'm posting a bit later than I normally would but any time is a good time to post. Tonight I have a watercolour tutorial. I haven't done any nail art like this for such a long time so I thought it was it about time I did some more. I absolutely love the way this nail art turns out. You can create such amazing designs whether you do the colours in sections like in the video below, or layer the colours on top of each other.

For this tutorial I used three colours:
Babe It's Blue - Maybelline Color Show
Pink Boom - Maybelline Color Show
Palette Play - Ulta3

I also topped it with the Revlon Matte Top Coat because I like the way a matte finish makes it look like real watercolour art.

(Look! This hand position is back) 


Watch the video below to learn how I did this design, and let me know what you think! Thanks for reading and watching!


Friday, August 15, 2014

Water Marble Tutorial

Hi everybody! Sorry for the lack of posts lately, but I hope this tutorial makes up for it. When I decided to make tutorials, my best friend requested I do a water marble one and I finally got around to it. It was a lot harder to film than I thought so it's not the best but I'm happy to post it anyway. This post will be very wordy as I'm going to share what I've learnt over the past year when it comes to water marbling.

Unlike a lot of other people, I've never had difficulty with doing water marble designs. The only trouble I face most of the time is finding polishes that spread well together. I've found the best to use are Essie polishes and they must be new polishes as well. Old polishes never spread well so whenever you get some new polishes, try water marbling out and see how it goes! I tend to use polishes from the same brand as well as they're the same formula and sit nicely on top of each other.

Many other people insist on using filtered water, but I never have. I just use water straight from the tap and I'll either let it sit for an hour to become room temperature, or I'll put a dash of warm water in it to make it less cold and so that I can start using it straight away. Room temperature water is important though; the water shouldn't be too cold or too warm. Don't forget to tape around your fingers too, otherwise it's so messy and time consuming to clean up.

I use toothpicks to create the designs, but I know other girls use needles, pins or small dotting tools. Anything with a point is perfect to use as it creates sharp and straight lines. And remember to use only the point of it, don't dip the whole toothpick in. Another good point is after dragging through the polish, dip the toothpick (or whatever tool you use) slightly into the water before pulling it out. This just creates a neat point in the design and doesn't pull the polish up with the toothpick. And between each or every few drags, wipe the toothpick off otherwise the build up of polish ruins the design you're trying to create.

In the video, I created a few designs just to show the different outcomes. My personal favourite is the first design I did, which I learnt how to do thanks to this tutorial by Erinzi. She also has some great tips so check her post out too. 

I generally only ever use two colours when I do water marble designs. That's just my personal preference though, but more colours work as well if they're the right consistency and spread easily enough. It's very important to work fast as well, the process in the video is sped up otherwise it'd go for about 20 minutes, but you should work fast to avoid the polish drying too much (which happens in the first one I do).

After putting your nail on the area you want and into the water, make sure to remove the extra polish because if you don't it will all get dragged up with the finger when you pull it out and ruin the design so don't forget that part!


As you can see, my design smudged a bit. That's because there were bubbles on the nails that were still wet when I applied the top coat. I haven't found a good way to avoid these just yet, except to let them dry properly. My camera battery was dying so I had to do it quickly. Also, when I remove my nail from the water, I shake it off gently and dab my finger on paper the get excess water off. I'll also sometimes blow on my nail to move the water or very, very lightly dab it with a cotton tip so that I don't damage the design.

I think that's pretty much it, I'm sure there are plenty of other tips I'm forgetting but I hope I've covered most of them. It's a time consuming process and takes a few goes to get it right, but if you're using new polishes with the right consistency (not too thick or too thin), room temp water and are working fast you should be able to create some successful water marble designs.

So check out the video below and let me know what you think! And don't be afraid to ask me any questions if you're having trouble, I'll be happy to help because water marbling is such a fun design and I love seeing everyone's posts on it.


Thanks for reading and watching! 

Saturday, August 02, 2014

Neon Splatter Nails + Tutorial

Hellooo! I'm on a roll this week in regards to nail art and it feels really good! I've been blogging for almost a year now and I finally feel like I've gotten the hang of it. There was a point where it felt like more of a chore than a hobby and there have always been a few absent weeks for me like when I lost my dog or had to work a lot more than normal but lately it feels amazing to be doing what I'm doing. And since I started making tutorials two weeks ago I've felt even more passionate about nail art. I also reached 500 followers on Instagram this week so I'm just feeling very appreciative of what the nail art community has done for me and how lovely it feels to be involved within it.

Anyway, onto the post. As you all know by now, I absolutely love splatter nails. I think they'll always be my favourite nail art design. So of course I had to film a tutorial for them. Splatter nails are quite an easy, albeit messy, design to do. All you need basically need is straw and polish. It's also handy to tape around your nails for an easier clean up. I can guarantee it'll be messy and a bit tedious to clean up, but the tape makes it a bit quicker regardless.

Sometimes I find that the polish can sort of plop onto the nail which causes a blob to form, whenever that happens I always gently dab at the area to lightly remove extra polish and make it look neater. I think this occurs because of the extra polish that collects around the outside of the straw, so occasionally I'll wipe the excess polish off on the bottle so it doesn't build up.

It's always very, very important (and probably obvious) that you don't inhale through the straw because you'll breathe in the polish fumes very strongly and that's definitely something you don't want to do!


Polishes used:
Nail Envy - OPI
White On - Sally Hansen
Fruit Tingle - Ulta3
Tahiti - Ulta3
Jelly - Ulta3
Citrus - Ulta3
Insta-Dri Anti-Chip Top Coat - Sally Hansen


Thanks for reading/watching!


PS I would absolutely love it if you checked out my best friend's food blog! I thought I would give her a little shout out just in case any of you are interested in some easy recipes for various types of yummy food!

Wednesday, July 30, 2014

Purple Gradient/Ombre + Tutorial

Hello everyone! Today I have another simple tutorial for you all. While filming this I realised I've been using purple a lot lately so I'll try to mix it up next time!

This tutorial is just an easy purple gradient/ombre, I've done a bunch of them before so it's nothing new to the blog so let's just jump to the polishes, pictures and video!

Polishes used:
White On - Sally Hansen
Palette Play - Ulta3
Spring Break - Ulta3
Lotsa Fun - Ulta3
Insta-Dri Anti-Chip Top Coat - Sally Hansen


I hope the video has the right pace to it for people wanting to try this out, it was a very tedious filming process as I discovered a new setting to film, which means better quality video, but it meant I had a shorter amount of time to film and I put this over two SD cards and still had to delete some footage like painting the base colour and doing a proper clean up. But clean up is easy as long as your cuticles look neat and free of polish. I also realise this isn't such a dramatic gradient but it's still just as eye catching and a cool design to show off your new found skills! Plus you can use ANY colours with this design, it's all up to you.

Sunday, July 27, 2014

Colourful Leopard Print + Tutorial

Hello lovelies! Today I have another tutorial for you, and even though there are so many leopard print tutorials out there, I thought I'd do my own just for the sake of it. I'm still tweaking the way I film, you'll notice that this set up is different to my first video and I think it works better for the positioning but it's a little annoying as the camera was right in the way, but it works well so I'll see how I go next time I film.

As you may know, I was not a fan of leopard print until I did it for the 31 Day Nail Art Challenge in September last year and ever since then I've enjoyed it as long as it's bright and colourful. I don't think I've ever done a leopard print using a lot of colours, I've mostly stuck to one colour theme but this time I wanted to do something different.

Polishes used:
White On - Sally Hansen
Palette Play - Ulta3
Party Shoes - Ulta3
Butler Please - Essie
Mojito Madness - Essie
Black Satin - Ulta3

Insta-Dri Anti-Chip Top Coat - Sally Hansen


Hope you enjoyed this post! Don't forget to check out the video above and watch it on YouTube because it's easier to view.
I'll be back again during the week with some new posts!

Thursday, July 17, 2014

Purple Gradient Dotticure + My First YouTube Tutorial!

Hey everybody! I am super excited to be doing this post for you today. As you can tell from the title it involves my very first YouTube tutorial. Over the past week I had been deciding whether or not I wanted to start making tutorials, but ultimately I decided why not! Now, it's not the best quality as it was a quick decision and I haven't played around with the cameras settings properly yet and I'm not about to go out and buy an expensive camera in case this whole thing doesn't work out. So please excuse any quality faults etc, but do leave me some feedback if you have any!

You'll notice this is a remake of some nails I did a few weeks ago, back then I used blue polishes and this time round I'm using purple polishes.


The polishes I used were (from darkest to lightest):
Devil's Advocate - Essie
Spring Break - Ulta3
Palette Play - Ulta3
Bond With Whomever - Essie
White On - Sally Hansen
With a base of OPI's Nail Envy and a top coat of Insta-Dri Anti-Chip by Sally Hansen

Please check out the video below and like/comment/subscribe etc. I don't know how often I'll be posting videos as it took most of the day to shoot, edit and upload this one (the most annoying part was finding music for it), so once I get the hang of it I'll figure out what my schedule will be! 


Let me know what you would like to see a video of next! 

Thanks for reading/watching!