Friday, April 03, 2015

Floral Water Decals - Born Pretty Store Review

*This product was sent to me for review, all opinions are my own

Today I have my final review of the products I was sent by Born Pretty Store. This time it's these lovely floral french mani water decals which cost $2.63AUD for 1 sheet of 14 decals. I got a bit excited to test these out so I completely forgot to take photos of the process but if you check out this post I tell you there how to apply water decals.


I was going to use a base colour but couldn't find one that worked well with it so I went with the traditional natural base. The decals were easy to apply and even though they were a bit too long for my nails they were very easy to shorten, all I did to achieve that was while the decal was still wet I bent the excess over the free edge of my nail to let it dry and once dried, I used acetone on a small brush to dissolve the excess and smooth the edge out. And because they're so thin you can easily reshape them on your actual nails too.

Once dry all you need to do is top coat your nails and they'll last for several days. They're easy to remove as well, all you do is remove them as you would normal nail polish!


I love how these look and I think I want more french mani decals because they're gorgeous and so easy to use. I'm not even a big floral person but I absolutely love the design on these! These are definitely my favourite of the four nail art products I received.

If you want some nails that stand out but don't want to put a lot of effort into them then definitely get these, so quick, easy and very pretty.

Don't forget if you do purchase anything to use the code MEPUK31 for 10% off the Born Pretty Store website.

Thanks for reading!

Melissa.

Sunday, March 22, 2015

Rose Nail Studs - Born Pretty Store Review

*This product was sent to me for review, all opinions are my own

Hi everyone! Today I have my third review of nail art products from Born Pretty Store. I chose some of these cute 3D roses in the colour lilac as I don't normally use nail art studs but I wanted to try something different and I loved the look of these so let's get into it!

These studs are $3.95AUD for 5 pieces and there's a range of colours to choose from. They're quite small when in the packet but once they're on the nail they seem a bit large. This however could just be because I have quite small nail widths so any studs look big on my nails (which is why I don't use them often). And they're very 3D, as in they're high when on the nail and stick up quite a lot. Because of that I think it would get in the way if you wanted to wear them for a while, but for decorative purposes or a special event they'd be perfect!


I thought I would do something simple to match the delicate look of the rose studs and I think the dots fit perfectly to keep the mani looking pretty!

All in all I quite like these studs, they're completely different to what I'd normally use and that's what makes them interesting. They don't budge when they're on the nail but they're also easy to pull off and can definitely be re-used if you want to keep them. They do stick out a bit so you'll have to be careful when wearing them so they don't get caught or ripped off. For $3.95 though it's a good deal because of the fact that you can reuse them multiple times without them getting ruined.

Don't forget to use the code MEPUK31 for 10% of the website

Thanks for reading!

- Melissa.

Friday, March 06, 2015

Starry Sky Nail Stickers - Born Pretty Store Review

*This product was sent to me for review, all opinions are my own

As I mentioned previously, I have another Born Pretty Store nail art product to review! This time around it's these nail art stickers which are based on Vincent Van Gogh's The Starry Night painting. In this sticker pack you get two rows of seven different sized stickers for $3.88AUD. The stickers themselves are quite long so if you've got small nails like I do right now you'll have to gently file or cut them down to the length of your nail. The annoying thing about that though is that sometimes you miss out on the best part of the sticker.


The above picture is what I mean by filing down the extra bit. It was such a long sticker and to achieve the perfect length I gently filed the sticker against the free edge of my nail being extra careful to not actually take any length off my own nails. It comes away so quickly and easily that it's easy to not get your own nail.


As you can see in the photos, the details of the stickers were really hard to capture because of how shiny they are. On my index and middle fingernails I placed the top of the sticker at my free edge and trimmed the bottom of the sticker so that I was getting the details from the top of it and not just more dark blue patterns like the other two nails. This proved to be a difficult process though as I couldn't trim it exactly to my nail shape so I had to use acetone to get that perfect curved shape near my cuticles. And as you can see, the silver went everywhere. It was so hard to clean up and I wish I hadn't tried it and just stuck to filing at the free edge. 

The durability of the stickers wasn't the best and by time I had finished my other fingers the first one I had done on my pinky had begun to peel off even though I had top coated it. So they didn't last very long but they did look lovely, much better than in pictures. You could see all the detailing of them, it's just that when it came time to photograph them the sparkliness of it all got in the way and my camera did not like it at all.

I would love to try out more nail stickers from the website though because before nail art that's what I would use a lot of and I loved them, so they're definitely an easy way to get great nails with little effort! 

Don't forget that you can use the code below to get 10% off when you buy anything from their website, maybe try out some of their nail art products or check out the wide range of other products they have! 


Thanks for reading!

- Melissa.

Tuesday, March 03, 2015

Bra Water Decals - Born Pretty Store Review

*This product was sent to me for review, all opinions are my own

Recently, Born Pretty Store sent me a few items to review for them. This is the first of four reviews coming up in the next week or two, so keep an eye out!

These bra water decals are really cute and quite quirky actually! I haven't come across any nail art products like these ones before so I thought they would be fun to try out. Water decals may seem daunting to apply, but it's pretty simple as long as you're careful and don't rush the applying process, plus there's instructions on the back that are so easy to follow you can't really go wrong.


As you can see in the above pictures the process is simple, you choose which decal you want, cut it out, peel off the front plastic protector, dip the the decal in water for 10-15 seconds and gently lift the decal off the backing. I like to lift the decal with my nail (as the picture shows), then grab it with some tweezers and apply it where you want it on the nail. Make sure to dab the nail and decal with some tissue or paper towel to dry off the excess water and to make sure the decal doesn't slip around. Then it's just a coat of your fave top coat and you're done! You've got some cute nail art and it didn't require too much effort.


Seriously, how cute are all the little designs! Especially the thumb one, which I love because it's a lingerie set. There's so many to choose from and to mix and match with that whatever decals you choose from this set, your nails will be adorable and a lot of fun.

The base is Ulta3's Sour Grapes which is quickly becoming my favourite purple.

Don't forget to check out all of Born Pretty Store's nail art products and use the code below if you want to purchase anything. They also offer free shipping which is always a good thing! Shipping usually takes a few weeks to Australia, I believe my products arrived in about three weeks, which is really quite good because I've found with some eBay sellers products take at least five weeks to arrive. So all in all, I really do love this website and their products, I've ordered from them a few times in the past and have never had a problem with them, so I definitely recommend them and encourage you all to check them out!


- Melissa.

Sunday, March 01, 2015

February Round Up

I have another round up post! I didn't post any nail art this past month but I was definitely posting on my Instagram. I'll definitely try to post more in March and I think I said that last round up post but February has just gotten away from me and a lot has been going on. So let's try for next month!


I did quite a few designs in the first two weeks of February but not as much in the last two, but still there's a good range of designs! I'm really happy with all my nail art from the past month, let's hope I can do even more in March!

-Melissa.

Wednesday, February 25, 2015

February BellaBox Review

Today I have my first bellabox review of this year. I did receive the January box but wasn't in much of a blogging mood and didn't find the box very 'review worthy' so I didn't bother posting about it. But I'm trying to get back into the swing of blogging and I'm starting with this review!


This month bellabox teamed up with three Australian magazines, Elle, Harper's Bazaar, and Cosmopolitan. I was lucky enough to get to choose which magazine I wanted and I picked Elle, because it's a magazine I've never read before and thought there might be some good items in the box!

I felt a little indifferent towards the products though. I received some products I've gotten in the past and also products that I shouldn't be receiving at all according to what I put in my beauty profile on my account.


Let's get into the product reviews!

  1. Essie Nail Colour in Truth or Flare (RRP $16.95) - As a nail blogger it's a no brainer that I'll love this product and any nail polish or nail art item that comes in my bellabox. Every member got an Essie polish and there was a range of colours sent out. The polish I got looks significantly different to what the colour on the official Essie website does so I'm wondering whether they changed or renamed the polish. But either way I love this colour. It's kind of a slate colour with strong blue undertones. It's so nice on my nails! See below of swatch pictures.
  2. Indio Multi V-Serum (RRP $139.00) - I don't mind the brand Indio, I've gotten their samples before and even purchased their products but as I've probably mentioned before I had an allergic reaction to the salicylic acid in one of their cleansers so I just sent all the products back as it was easiest to just start over with a different brand. This smell of this serum reminds me of beer or some type of alcohol and I don't enjoy it. I only used it once so I can't vouch for it's effectiveness. It does mention that it's a hydrating serum though which isn't something I need so I won't be using this or buying it myself.
  3. Burt's Bees Mini Lemon Butter Cuticle Cream (RRP $14.99) - Another product I can't help but love... except for the fact that I already received a sample of this back in August. I'm happy I have another sample which now brings my total tins of cuticle cream up to five (six if you count the sample of this my mum got in hers this month which of course she'll give to me), but I am annoyed I received something I had already gotten in a past box. So I definitely have enough cuticle cream to last me at least a year, probably two actually.
  4. Neutrogena Hydro Boost Water Gel ($24.99) - This is the product I'm most annoyed about this month. This is the opposite of what I need. My skin does not need hydrating, it needs moisture sucked out of it really. I did try it though because in the end it was free and it's a sample but within half an hour my skin was a shiny mess so it's definitely a no go. I'm pretty mad about receiving it though because my beauty profile clearly skin my skin is oily and NOT dry. They obviously don't take note of that.
  5. Aveeno Daily Moisturising Lotion (RRP $14.99) - I definitely got my fair share of moisturisers in this box. This one I can use though because it's mostly for the body and I tend to get dry legs a fair bit so I'm happy with this one.
  6. Kerastase Paris Nutritive Nectar Thermique (RRP $48.00) - I received this product back in December so that's another product I've already received but I really did love this one so I guess it's okay that I got it again.
 (Essie - Truth or Flare)


Overall I wasn't too happy with this box. I shouldn't be receiving one two products that I've already received before, it just seems like a waste. And I definitely shouldn't be getting hydrating moisturisers according to my beauty profile.

I am considering cancelling my subscription but I'll give it another month because I really do enjoy getting a box of goodies at my doorstep each month and for only 15 dollars it's not at all expensive. Here's hoping next month is better!

- Melissa.

Friday, February 06, 2015

January Round Up

So, long time no posting! But I did warn that it would happen so there's no surprises there! But I thought I would do a round up post for the times I don't post much and round up what I've been doing recently. I've actually found that I get a lot more nail art done when I'm not worrying about writing the blog post to go with the pictures so if you follow me on Instagram you'll have seen that I was posting a lot recently.

Let's look at some nail art!

I absolutely love this colour combination for the leopard print below. The silver and coral polishes go really well together and I'm glad it turned out as good as it looked in my head.

I filmed a tutorial for this design below (see end of post for video). I love the colours and this design is definitely in my top ten favourite things to do.

This post and the one above were posted on my instagram while I was away in Queensland for a few days. It's a sort of plaid like design that is super easy to do.

After my little holiday I took a mini break from nail art just because my nails were in bad shape from being in the pool a lot, but I came back with this awesome splatter nail art. It's one of my favourites that I've ever done, the colours just go well together and the splatters are perfect sizes!

This ended up being the base of some nail art that is under this post but I thought I'd chuck it in here seeing as I did post it on my instagram.

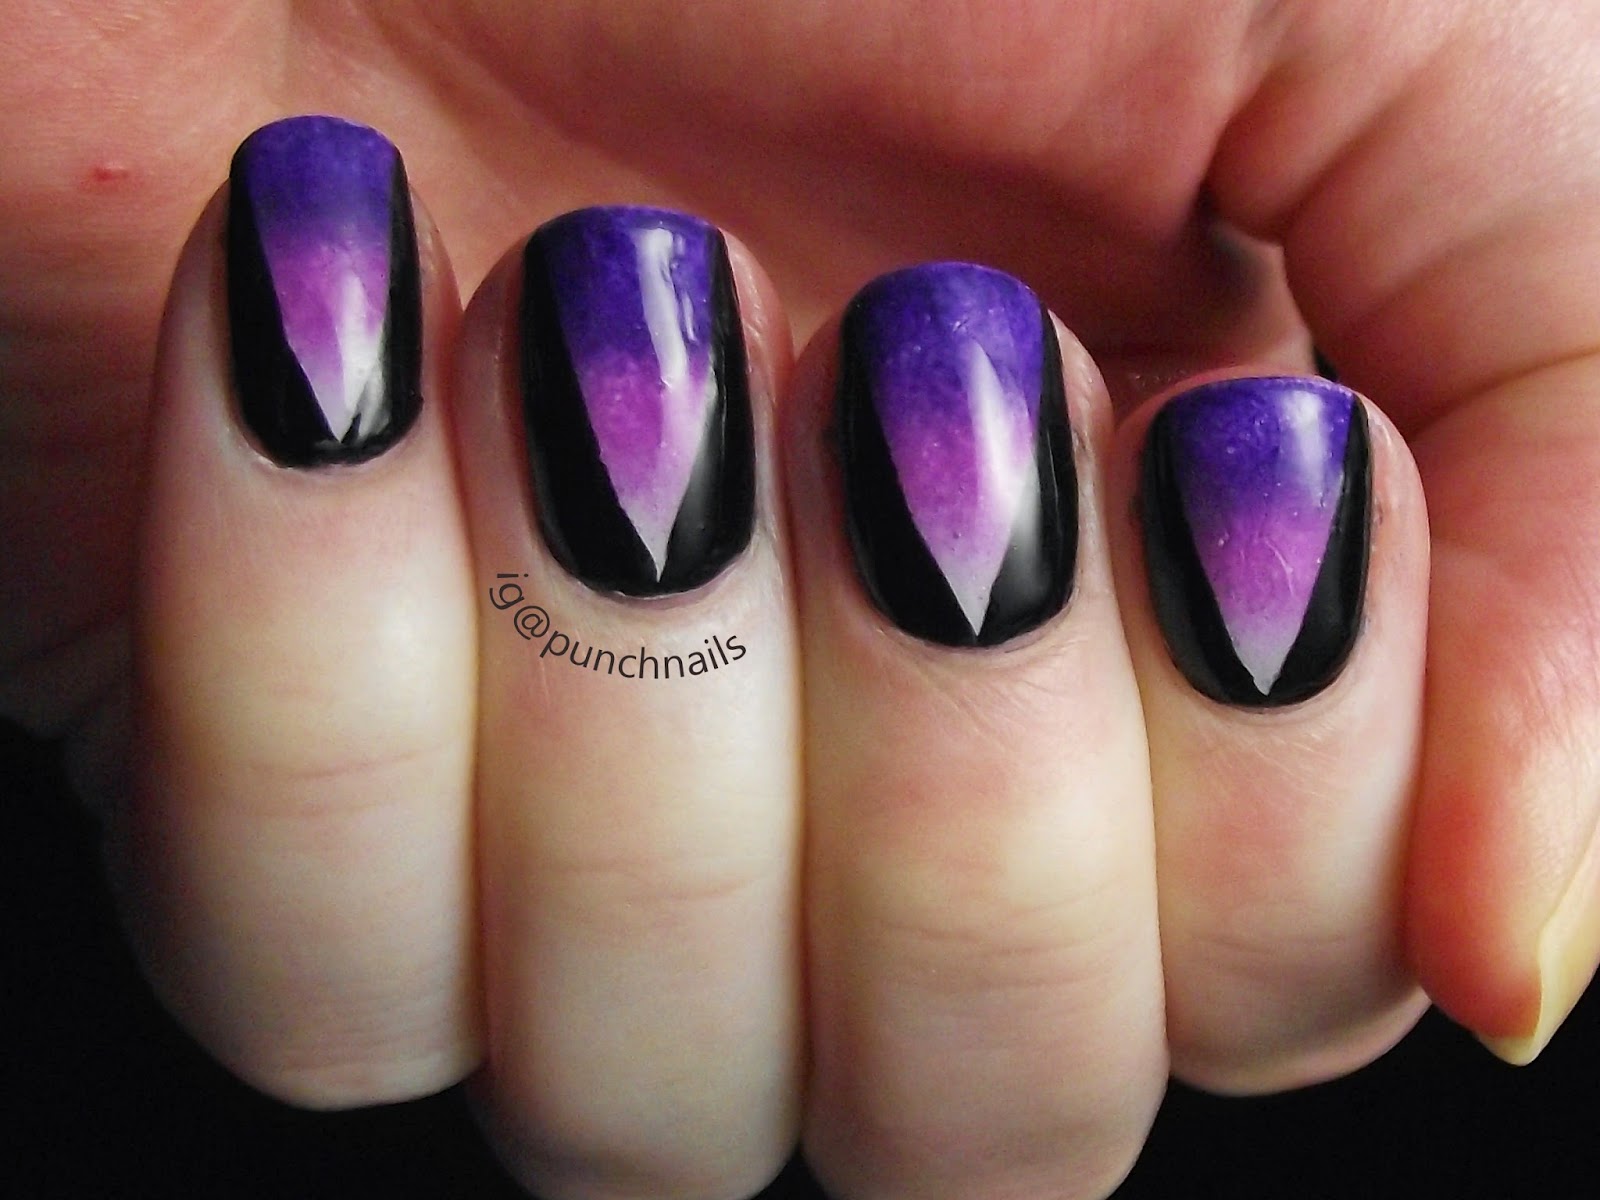
Painting the black sections over this gradient just bought it all together for me and made the gradient look smoother and neater. I used to tape to get clean, straight lines.

I've only done this design once before in a mix n match mani but I thought I'd incorporate a few colours and see how the pattern turned out and I love how it ended up. I did this in about ten mins (minus the white polish drying time) so I think this will be my go to mani when I'm short on time or lacking inspiration.

And here's the video for the striped nail art.


That's all for this round up post! I actually have a few exciting posts coming up, but I'm not exactly sure when they'll be so keep an eye out for any posts over the next month or so! I'll try to make posts for at least one mani every few weeks, but I enjoy doing these round up posts till I get back into the flow of blogging.

Thanks for reading!

- Melissa.